If you’re building a Voron (or any custom 3D printer) and no frame kit exists for your size, cutting your own aluminum extrusion is unavoidable.
This article documents the process of cutting raw 2020 aluminum extrusion for a custom 3D printer frame, using dimensions extracted directly from the Voron Trident BOM. The focus here isn’t on showing the only way to do this, or the “best” tooling — it’s on producing consistent, square frame members so the frame assembles cleanly and without unnecessary correction later.
Safety First (Read This Before Anything Else)
When cutting aluminum extrusion, you must wear safety glasses.
Hot aluminum chips come off the blade. They’re sharp, they move fast, and they absolutely will find your eye if you give them the chance. I’ve worked in shop environments my entire life, and I promise you: a piece of hot metal in your eye turns a normal day into a hospital visit and a very bad week.
If you ignore everything else in this article, don’t ignore this:
Wear safety glasses. You only get two eyes.
Extracting Lengths From Misumi Part Numbers
All frame dimensions come directly from the Voron Trident BOM. As explained earlier in this series, Misumi part numbers encode the extrusion profile and the intended length.
Those length values define design intent — but they are not sacred numbers that override tooling tolerances or real-world fabrication constraints.
When cutting your own extrusion, the BOM tells you which frame members must match each other in length. That distinction matters far more than hitting an exact nominal dimension on every cut.
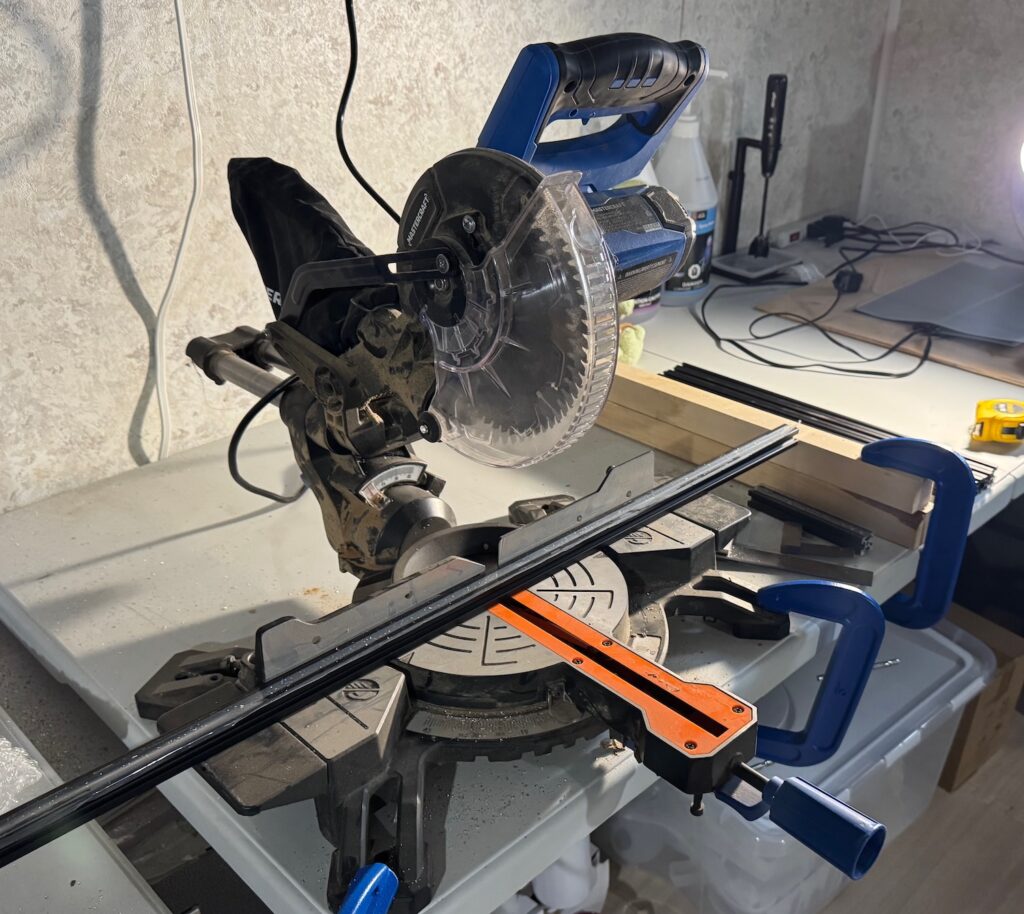
Basic Cutting Setup (One Practical Approach)
This is not the only way to cut aluminum extrusion, but it’s a simple, accessible setup that works well.
The setup used here consists of:
- A compound mitre saw
- An aluminum-specific blade
- The saw clamped securely to the work table so it cannot move
Aluminum extrusion cuts cleanly with the correct blade, but movement is the enemy. If the saw shifts during cutting, repeatability disappears immediately. Clamping the saw removes that variable.
Squaring the Saw Blade
Before cutting anything, the blade must be square:
- Horizontally
- Vertically
This is especially important on a dual compound mitre saw, where errors can exist in more than one plane.
A machinist’s square was used to verify blade alignment. This step isn’t visually exciting, but it determines whether your cuts will actually be square. If the blade isn’t square, nothing downstream will be either.
Setting a Repeatable Length Stop
To achieve consistent cuts, physical stops matter more than tape measures.
In this setup:
- Simple 2×2 blocks were clamped to the table
- The blocks act as a hard length stop
- The desired length was measured carefully and verified multiple times before cutting
Once the stop is set, every matching extrusion can be cut to the same length without re-measuring each piece.
Measure carefully. Measure again. Then cut.
What Actually Matters: Consistency and Squareness
This is the most important takeaway.
If your uprights are intended to be 450 mm long but end up at 453 mm, that’s acceptable — as long as every upright is 453 mm.
What causes problems is inconsistency:
- One piece at 450 mm
- One at 451 mm
- One at 453 mm
- One at 449 mm
Matching lengths and square cuts allow the frame to assemble cleanly, square naturally, and without endless shimming or correction later.
Accuracy matters — but consistency matters more.
A square, consistent frame saves time, prevents alignment headaches, and makes every step that follows easier.

What Comes Next
With the frame extrusion cut accurately and consistently, the next steps move deeper into fabrication.
Upcoming posts and videos in this series will cover:
- How to tap aluminum extrusions for a 3D printer frame
- Printing jigs and drilling a printer frame accurately for blind corner joints
- Printing jigs and drilling gantry mounting holes for a Voron Trident-style printer